How to Draw a Griffin. There are many weird and fantastic animals and monsters through different legends and mythologies worldwide.
One of the most famous animals is the powerful Griffin, and we usually think we are from Greek and Roman mythology.
This creature has the body of a lion while its head, wings, and greenhouses of a giant eagle. It means it sounds very cool, but it can also make learning difficult to draw a griffin.
That’s why this tutorial is there; in the end, you will see how fun and easy it can be!
You can draw many more characters like bow and arrow drawing, Anubis drawing, betta fish drawing, cobra drawing, blueberry drawing, and coconut drawing.
Drawing Griffin
Step 1:
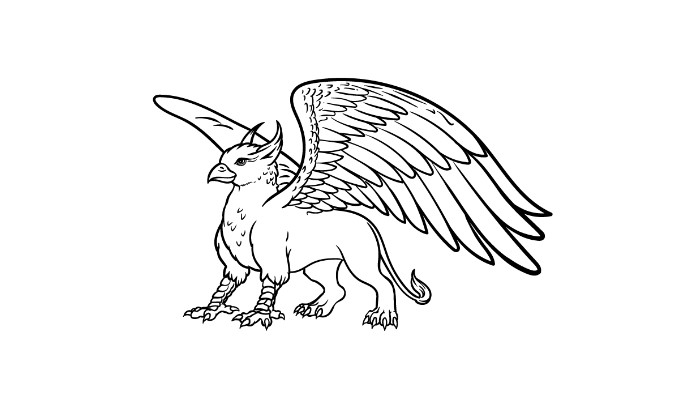
When we start this guide on drawing a griffin, we will first draw the head and beak of the beast. We will use a riding line to outline the head and neck.
It will be to give a softer and more plumage texture. We will also use curved lines, culminating in a clear point to give Griffin a pointed beak.
Finally, draw your eyes on your face, so we can finish this step by drawing two sharp feathers that push the top of the head.
After all these elements are designed, we can go to the second stage of the guide.
Step 2:
For this next part of your Griffin design, we will add the front legs to the creature. As we mentioned, they will mainly have the shape of a lion’s legs, but the extremities will culminate in animated greenhouses.
Use more irregular lines to create the round legs as they appear in our reference image.
Then we will use many small ways connecting to make the wrinkled legs of the Griffin, and finally, you can draw the greenhouses with claws in the end.
Step 3:
Scratches are almost always represented with large and impressive wings, which we will draw at this stage of our guide on how to draw an emphasis on.
At the moment, we will draw the wings fronts.
The first one will extend up and behind the base of the head and, as we see in the reference image, will be very impressive.
Draw another curved line for the wing contour on the other side, so you can finish drawing another leg below.
Add details of the feathers to the door -ma, so we can go to step 4!
Step 4:
This part of your Griffin design will see that you will add the last leg to the creature. Use more curved lines to draw the other rear leg next to the other.
It will also be connected to the rest of Griffin’s back, and the tail will flow backward.
There will always be a space between the wing and the back of the Griffin, but we will fill it soon!
Step 5:
Continuing this guide on how to draw a griffin, we’ll now add some penalty details to the griffin wing.
To do this, track many small curved lines along the front edge of the wings. As you approach the top of the wing, these lines can become larger and longer to make them look like bigger feathers.
When they are designed, we will be ready to add final details to the next step of the guide!
Step 6:
You are almost ready to go to the last step of this Griffin drawing, but first, we have some elements to add.
The main thing we will do is draw the rest of the wings, and we will do it using many other long curved lines to create more feathers.
These feathers will be much larger than all the others you have designed so far, filling the final space between the body and the wing.
Once the outline is over, you can add some details and items!
You can draw a background or add other mythological creatures to accompany some ideas. What can you think about finishing this image before the last step?
Step 7:
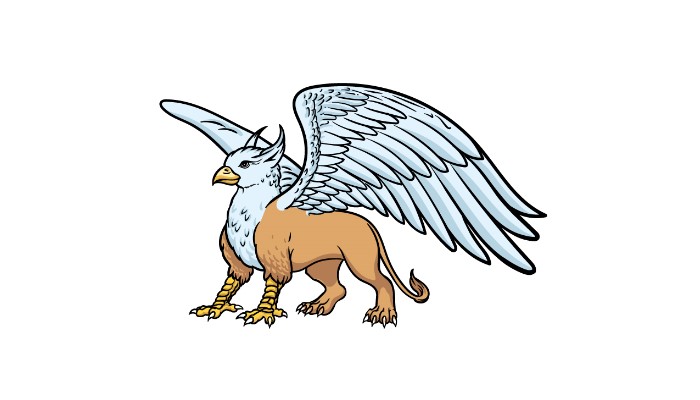
It is the last step of our guide on drawing a griffin, and we will end thereby adding some colors.
In our reference image, we use a clear brown color and enjoy the parts of the lion of the body.
Then we used yellow for legs and nozzle Eagle games. Then we finished using light and gray bruises for the head and neck feathers.
You can use similar colorful visits if you like this color palette, but what other colors and art media can you think of using?
See how you can make your Griffin get even better.
Make this griffin sketch even more majestic with these 4 fun and easy tips we have for you!
This Griffin drawing you worked on already has good detail, but it can be even greater with others!
A good starting point would be to add lines of texture to the wings and body.
You can do this with several small curved lines to create a hair and feathers look. They will help make Griffin even more realistic.
Once you have the range of drawing this Griffin, you can change certain aspects to make it more exclusive to you. It can be as simple as having the head in the opposite direction.
Or maybe you may have the wings to spread more or even double. You can facilitate the photos of real bird wings to help you.
Changes like these may seem small, but they can help you customize the drawing further.
Another way to bring your Griffin drawing to new peaks would be to add a background. Claws are fantastic creatures, so it means you can create any background you can imagine!
It can be a structure based on a world or a movie world, or you can create and project your fantastic scenery.
No matter what you create, any background will help make this image more fascinating because it will help create a sense of place.
Finally, you may want to add even more mythical creatures to this griffin outline. You would certainly have many options!
It can include creatures such as unicorns, dragons, or something more unusual like basil. If you have favorite fantastic creatures, it’s your chance to add them to this work.
If you need help drawing these additional creatures, you can probably find online images to inspire you as you fill this fantastic parameter you have created.
Your Griffin drawing is complete!
We hope you had fun recreating this classic mythological beast during this guide on how to draw a griffin!
Our goal with this tutorial was to facilitate your task so that you can focus on the pleasure of drawing without frustration.
Now you can take control and show your creativity by adding your details, ideas, and color choice!
When you are ready to learn more, visit our site because we have a lot more drawing guides so you can have fun. We also have more on the way!
Also Read: Jaro Education Shares All You Need to Know